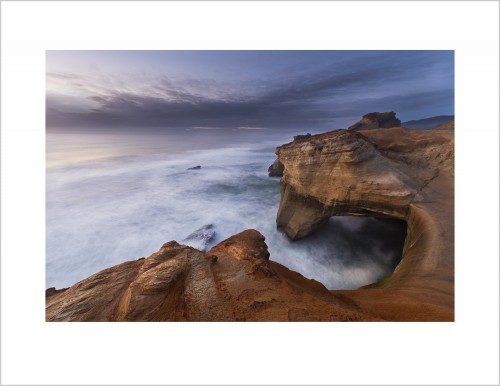
 On Wednesday I was digging around the archives, looking for something new for this month’s desktop wallpaper when I found an image I forgot I had. This is Cape Kiwanda, near Pacific City, Oregon. I did about 10 minutes of post-production on it in Lightroom 3 as one last hurrah before moving to Lightroom 4. Here are some of the steps, in broad strokes:
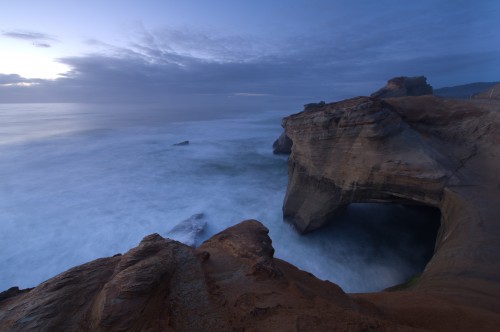 Step One (above – Click the images to see them larger)
Import from NEF. This is the RAW image with no adjustments. Straighten horizon and spot image.
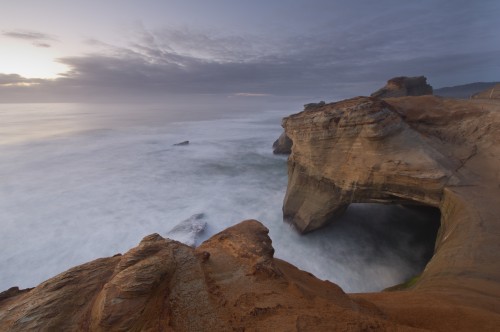 Step Two (above)
Colour balance warmed up, and then Basic Adustments: Exposure +20 Recovery 38 Fill Light 35 Blacks 11 Brightness +50 Contrast +25 Clarity +45 Vibrance +25. Tone Curve set to Medium contrast.
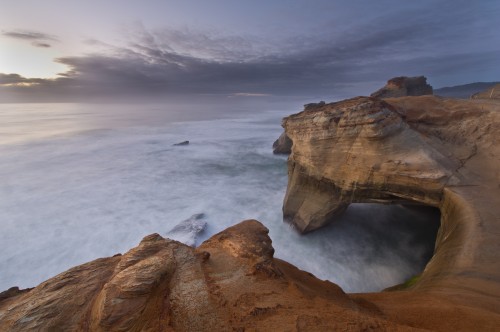 Step Three (above)
Dodge and burn, first pass. Mostly foreground and sky to add drama and push/pull the eye.
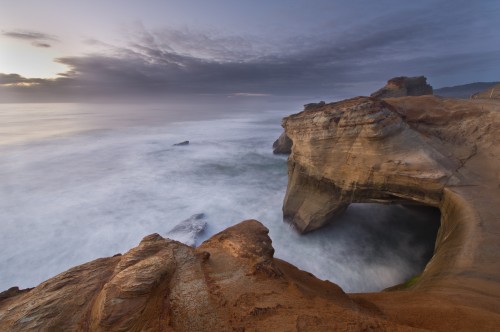 Step Four (above)
Dodge water to bring texture and emphasis of lines.
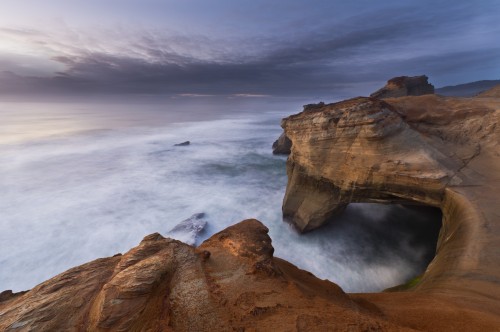 Step Five (above)
Lens Profile correction to remove distortion and chromatic aberration. Take to Photoshop (Edit in > Photoshop CS6) and work on left edge of sky with a little cloning, and a little stretching. Then darken the whole sky a little (Duplicate layer, blend mode to Overlay, then layer mask to remove everything but sky, then lower opacity to 20% or so.) Finally removing the small fence posts (top right), and re-spotting image. Selective sharpen and back to Lightroom to print large on my Epson 3880. Hope you find this helpful.

Comments
OK, I can follow along and see what you’re doing, which is always interesting to see how other’s work, but you lose me on the last step, I just don’t see the lens distortion and chromatic aberration… what am I missing?
Nice new design of the site, sometimes it’s not an improvement, but yours really is. 😉
Tom, if you click on the images and scroll through the pop-ups you’ll be able to more easily see the change in the image when the distortion is corrected. The chromatic aberration really can’t be seen unless you’re looking at it in a much larger format, but it was definitely there, particularly on the edges of the rocks at bottom left. Thanks for the kind words on the site. I’ve a little more tweaking to do re. the portfolios, but this is a good start.
Very informative thanks. I look forward to seeing more of these, particularly in LR4 to see how the different controls work.
Incidentally, have you used the camera calibration tab in LR.? The profiles for the camera -such as landscape, portrait etc can make quite a marked difference. I have recently started making custom calibration profiles for my specific camera using the colour checker passport, and it really can enhance the image.
Dave.
Yes, this is helpful. It is important for me to be constantly reminded of adjustments that improve my photos.
I hope that you write a follow -up to Vision & Voice, filled with new photos and procedures for us all to learn from.
BTW, I am re-reading Within the Frame and I just read p. 138 where you said, “Pay attention; you’ll find it much harder to shoot with a broken arm or from your hospital bed.” I’m sorry for the disastrous results of your momentary lapse of attention, but I appreciate the heads-up!
Hi David…love the new site…hope all is well…thanks again so much for sharing your craft and vision….:)
Sandy
Hey David,
Great looking new site!! A very informative tutorial here as well….
Best,
Craig
Hi David,
The new site’s looking great 🙂
I read about how you use dodging and burning to lead the eye but I don’t think it really clicked until I saw this post (what can I say, I take a while :P). Thanks for the lesson!
lovely- you’re gonna love, love, love Lr4- first thing is the recovery slider has been replaced with a highlights slider which recovers way more naturally and excellently. The blacks slider works backwards, and there are some other things to get used to but Adobe raw process 2012 definitely makes pictures look better. Also I’m glad that you dealt with that bright spot in the sky as I was thinking the same thing- also also the gradient filter in Lr4 does a great job for me darkening skies. Like I said- you’ll love it. Have a good one!
Great to read your post.Thanks a lot.Thanks a lot for the Wallpaper.
Great to read your post.Thanks a lot .Thanks a lot for the Wallpaper.
I just finished reading Vision and Voice. I think this post is a great supplement to the work you did in that book. Seeing some of the steps you take in working with your images inspires me to make more creative, refined choices when working with my own images.
Thank you, Billy. As I was writing this post I thought about dropping in the 4 main steps from my vision-driven workflow: Identify Intent, Minimize Distractions, Maximize Mood, and Draw the Eye, but somehow I got distracted. 🙂
Just wanted to say a quick thank you for writing this up. I get a lot out of posts like this and appreciate the openness and respect you show to your readers. Thank you.
Excellent write up! I would have never thought to use brush adjustments to dodge and burn a landscape image to be honest. I typically never go into that detail, especially not as far as cloning sky to continue lines. Thanks!
Very nice sequence of explanations David. I remain amazed at your level of tweaking in LR. I do all kinds of this in LR but reserve the lions share of my dodging and burning to Photoshop. The push and pull of painting with lights and darks is more iterative in my process, more akin to actual painting, that I prefer the comfort of a layer in PS. What I have found in LR4 is a much more robust, and refined set of tools with the Highlight and Shadow Recovery sliders. They are quite amazing. Thanks as always for sharing your processes and work and inspiration.
Bob
Pingback: Cape Kiwanda Post-Production | shootplex
May I inquire, David, as to what is finally causing the switch to LR4? Last time I asked, you mentioned not needing to yet. I’ve been holding off on the upgrade – though it is quite affordable – until I see real life examples of some of the benefits. I don’t like to trust only the marketing hype.
Steven – To be honest it was mostly the need to be up on it for teaching purposes. So I installed it on one laptop and played with it and liked it. In these cases I just go with it. I’m told that things under the hood have improved significantly, and while I’ve not seen it yet, I really haven’t looked. So, short answer, just trying to stay current and no reason not to.
As an amateur, mostly self taught from books and online sources, I found very most useful. Just to know how much post processing someone like yourself does using LR, which I also have, makes me feel that I perhaps do not do as much as is needed to make an image “sing”. Thank you for sharing, it will encourage me to be a bit more adventuresome.