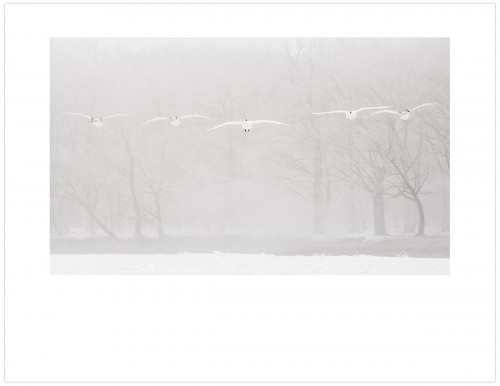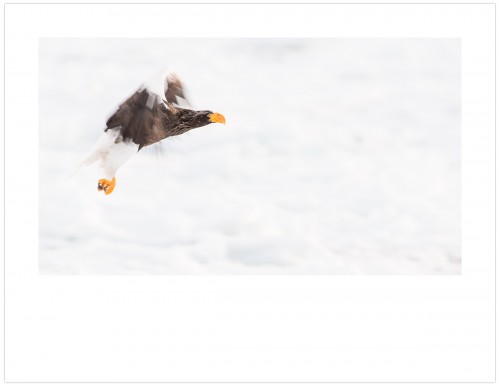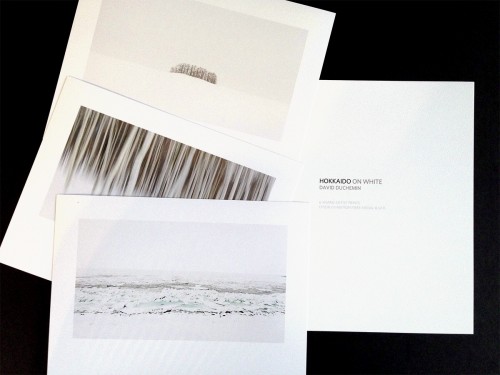
 After narrowing down my Hokkaido work through my edit process, I’m now left with a collection of images to print. Here’s my rough process.
1. Image Prep.
I take each image through a final pass in Lightroom’s Develop module. Here are the questions I’m asking myself as I go through the panels.
- Is my monitor recently calibrated?
- Am I completely sure there is no dust? One final pass at 100% or more. Clone or Heal out spots and residual distractions. If you have a hard time seeing dust, try keeping the image moving slowly in front of your eyes, the eye tends to track with the spots in motion better than when it’s static. Works for me.
- Are my whites white enough, my blacks black enough? This is a matter of taste to me, but the histogram’s really helpful here.
- Are the highlights or shadows blown? If so I pull both the black and/or white points back into range with the Tone Curve.
- Has my sharpening accidentally gone too far? Pull it back.
- If I added much Exposure or lifted my shadows a little, how’s the noise? Quick add to Noise Reduction. I use a very light touch here, often preferring the look of a little noise to the plastic-feel of too much noise-reduction.
- Have I enabled Profile Corrections in Lens Corrections panel? I don’t always, but usually. Check box if I forgot. Then make sure the Remove Chromatic Aberration box is checked if I need it. That’s in Lens Corrections > Color. I love this feature. Way better than it used to be.
2. Print Prep.
I print in Lightroom’s Print Module. Here are the questions I ask myself once I’ve chosen a paper type and size to match my images. For the Hokkaido work I’m printing to Breathing Color’s Optica One – nice matte paper without being overly arty and too textured.
- Have I set my Image Size correctly?
- Are my margins the right size? I prefer the top, left, and right, to be the same. The bottom will be what’s left over, and that depends on aspect ratio and orientation. But it’s always proportionately larger, like the images above.
- Is my print sharpening set? (Usually to High)
- Have I chosen the right paper profile?
- Am I going to be printing to this paper, this size, these margins and aspect ratio again? Make a print template and name it clearly. 17×22 Hokkaido 16:9 Horizontal on Optica. This saves me from stupid mistakes if I’m doing the same thing over and over, like using a wrong paper profile from a previous template. I almost always make a new template.
- Is the printer on, any inks running low?
- Hands and work surfaces clean? I hate printing something beautiful only to smudge it with a dirty thumb.
- Double check I’m printing with the paper the right side up.
3. Dry and Study Image.
- I study my work under a large diffused skylight. I don’t have a colour-corrected lamp for viewing my prints. One day, maybe. I like my natural light.
- Did I miss anything? Dust spots? Weird banding?
- Did the printer miss anything? Paper flecking off during or after printing can leave white specks with no ink. Some media I’ve learned to brush lightly with a large horsehair brush to avoid this.
- And most importantly, do I love it? I’m getting pickier, less willing to create anything that’s “good enough.” Or maybe my good-enough is getting better.
- If this image is for a client, then I sign and number it, and ship it. If it’s for my archives I signed it as an A/P, or Artist’s Print. Then I put it into a folio, usually one reserved for that body of work. Or I put it up and live with it for a while.
- Print it again. If it’s not 100%, I print it again. You have to be willing to print until you get it right.
I print with an Epson 3880 which I love, but I’m eyeing something bigger. I’ve had great luck with the Epson. Lately I use Epson Exhibition Fiber Paper, or Breathing Color’s Optima One.
If you want to bump your digital printing skills a little, or you’re just getting into it, I strongly recommend Martin Bailey as a resource. He’s got a great website, and for $5 he’s got a killer eBook (yes, Craft & Vision published it) called Making The Print. It’s what I used to get back into printing after letting others do it for me for too long. Don’t print yourself? There’s lots of good reasons not to, but almost all of this applies if you’re sending files to someone like mPix or WHCC.
4. Share The Work.
Get it out there. Make a couple extra prints each time you print something you love, and give it away. Want one of mine? I’ve got a set of 5 smaller prints from this Hokkaido series, on 8.5×11 that I’ll sign as A/Ps and send in a nice folio to one reader as a thanks for being part of what I do. No strings attached, leave a comment in the comment section – just an indication that you’d like to be in the draw – and we’ll draw something in a week or so, and put this package into the post.
As always, questions in the comments are welcome. I won’t always answer them all, but there’s often some good discussion and as long as I’m around and have time, I’ll be a part of that.
If you’ve missed some of the Hokkaido work, here are a few blog posts with some images:
- Postcard from Yamanouchi
- Postcard from Hokkaido
- Last Postcards from Hokkaido
- Hokkaido Re-Cap
- Editing Hokkaido

