
This is my confession. I no longer use a light meter. I don’t spot meter. In fact most of the time I don’t even know what metering mode I’m on. My life as a digital photographer became infinitely easier when I abandoned those, put my camera back to manual and simply began exposing for what’s important.
Whether you use a meter or not – and you’re more likely to do so if you’re using a DLSR without in-viewfinder live histograms – isn’t the point. The point is understanding how to make the photograph you want, and knowing how to use a histogram is – at least for the digital photographer – key to this. I’ll explain that in a moment, along with the explanation of how I expose my images, but first I want to talk more directly to why I am writing this.
Something of a religion has been made of histograms lately, and with it, like all religions, a growing list of dos and do nots. Don’t burn out your highlights. Don’t lose shadow in the details. And, like most religions, especially the weird culty ones, there is almost never an explanation of why this dictate is to be followed at all. Here, in point form, are the short notes:
Burned out highlights mean no detail in those highlights.
Blocked up shadows mean no details in those shadows.
This, we are led to believe, is bad. And so, because badness – one assumes – is to be avoided, we give our reasoned minds over to the Histogram, in the hopes that slavish obedience to It will save us from ourselves. Hail the Histogram.
But there’s a problem. Digital sensors can’t capture the full spectrum of light from darkest blacks to brightest whites in every scene. Which means there are scenes in which one must make a choice. Do I expose for the lights and – God help me – plunge the shadow details into oblivion, or do I choose the shadows and let the highlights disappear? And that’s the exact spot the beginners who struggle with this, get stuck. Needlessly stuck.
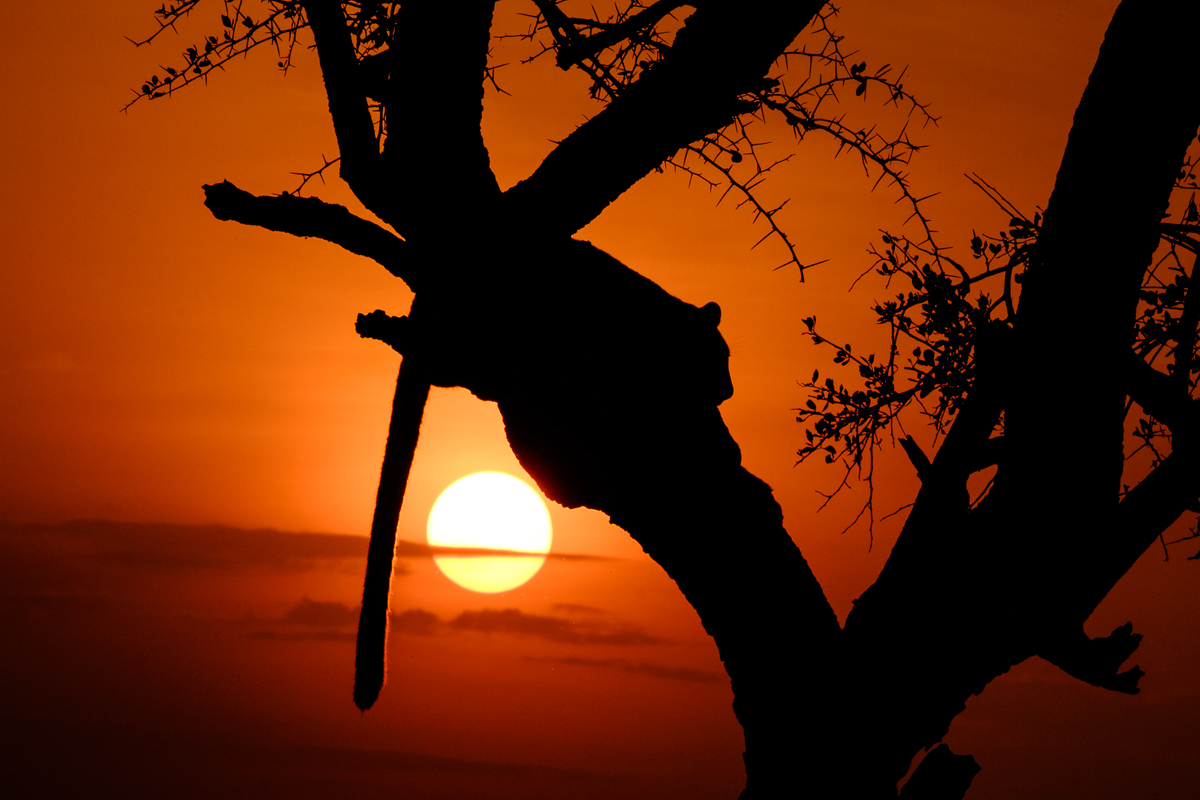
The leopard, silhouetted in front of the setting sun, has both blown highlights and plunged shadows.
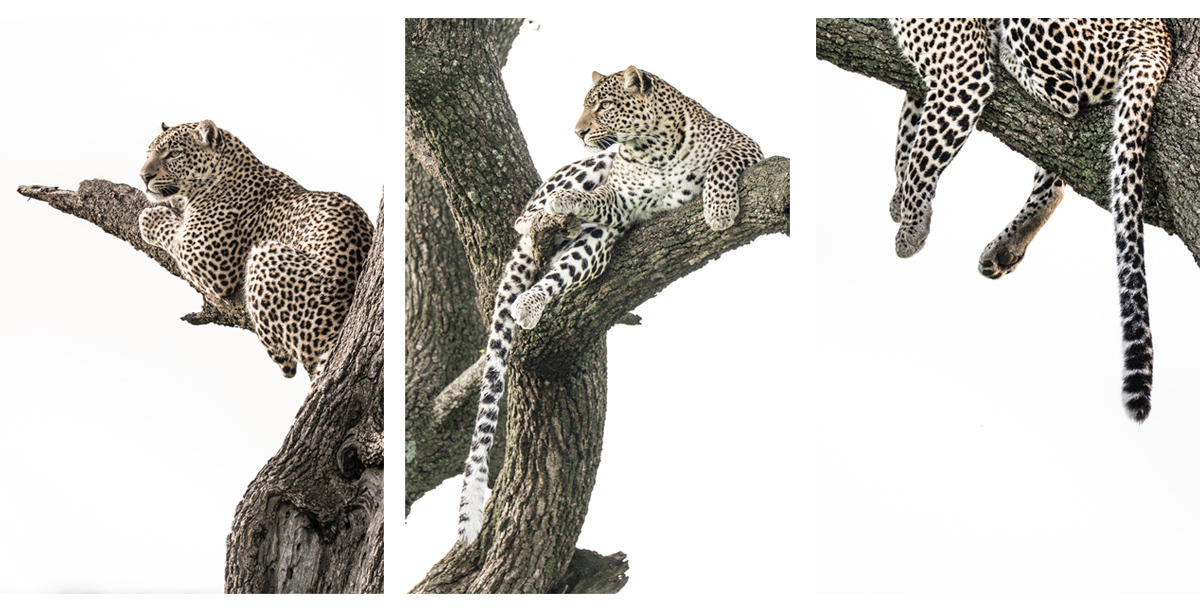
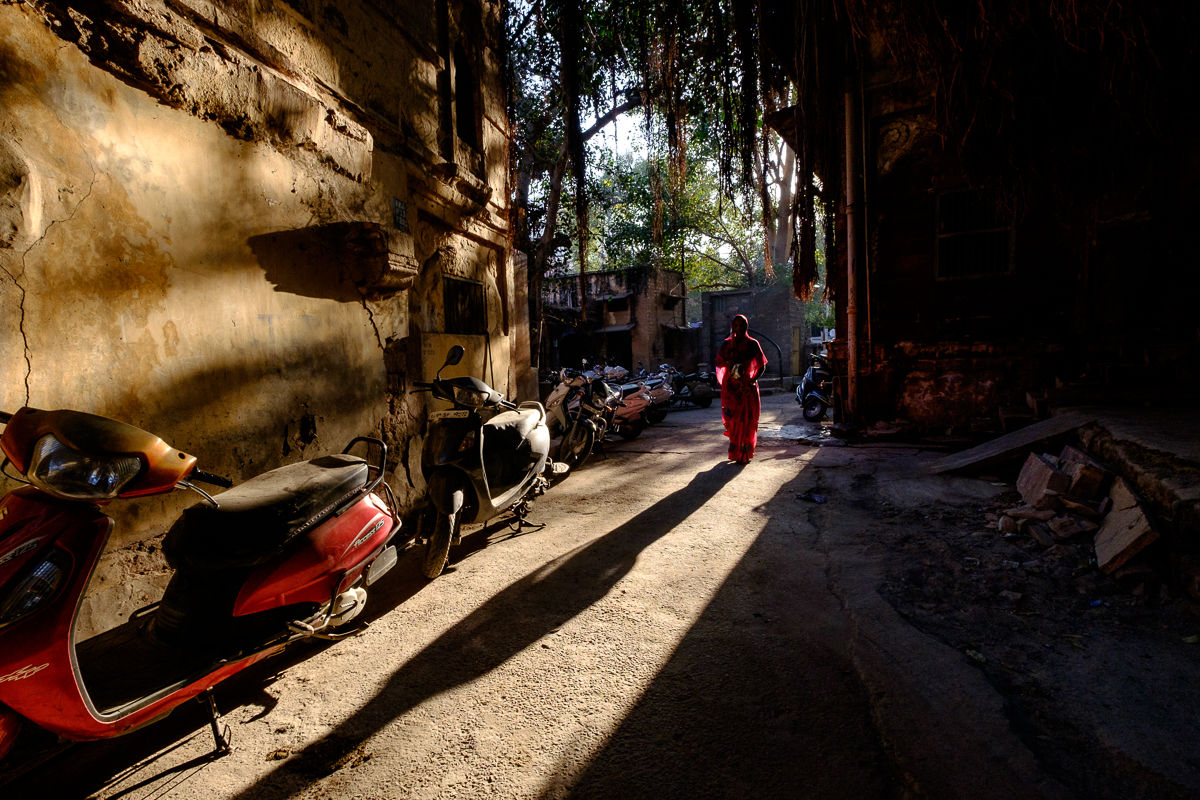
It’s also OK to plunge your shadows. Shadows are good. Say it with me: Shadows are good. Shadows add mood. They help isolate or frame key elements. They create new lines and shapes. Remember details have visual mass – they pull the eye. They provide information, and if that information is unnecessary, it can reduce impact by being a distraction. We used to do this all the time when photographing with slide film – underexpose the frame to make colours punchier, to keep the lighter, more important elements correctly exposed, and to add drama. There is no sin in trading details in the shadows so you can make a stronger photograph. See the images below where I’ve intentionally allowed the shadows to go much darker and imagine how much less impact the photographs would have if I’d exposed for them instead.
My camera wanted to make this scene a boring mess. Exposing manually I kept dialing the exposure down until I got all the highlights back (nothing running off the right side of the histogram). This gave me the best file. Then I underexposed it further in Lightroom. This gave me the best final photograph.
The sun is burned out. It will always be burned out. There is no detail in the sun. But I kept underexposing until the detail and colour in the sky came back.
That’s why metering modes aren’t helpful to me. Put the camera on manual, look at the histogram and expose according to where you want the information and where you want the impact. My Fuji cameras allow me to see what the image will look like if I dial that aperture closed, it’ll show me the impact of shadows. And it’ll show the inverse when I open it up – which highlights I’m blowing.
There is a give and take in exposing a photograph. Understand what you want from the image. Ask yourself where you want the information and where you want the impact. Will that overexposed area help you achieve your vision or will it pull the eye unnecessarily? Will those dark shadows create a stronger composition or will they obscure things that are key to your intent. Now, having done that, make the best possible exposure. Use your histogram, make it your b*tch, as they say. Don’t let it tell you what to do. It is there to tell you only what’s possible with the scene, not what you must or must not do.
A few last bits. It helps to shoot in RAW format – you’ll have much more flexibility and data. Using lower ISOs will still give you cleaner files and more flexibility. Where you can, it’s still prudent to push the histogram to the right to get as much data as you can. Don’t rely on the LCD screen to show you exactly what the image is going to look like – LCDs are for generalities, the histogram is more precise. Understand how to read the histogram, keep an eye on your blinkies so you know which details you’re losing, and most of all, expose for what matters to you, not to me, not to the pundits, but you. This is about making great photographs, not perfect histograms.
Like anything I write, my way is not the only way, but it’s the one that works for me. Questions?
Share the Love, Share this Post
Comments
Hello David,
great post! Six months ago I purchased an XT-1 and haven’t touched my DSLR since. I have found the histogram in the viewfinder to be extremely valuable just as you have pointed out. I havent explored this yet in detail, but since the histograms are for the jpeg, there is extra room for more exposure.
Is there a good way to evaluate how much extra headroom you have? I suspect it is scene dependent since one RGB channel could be blocking up while the others are not (example, taking a photo of a red flower) vs a scene that may be more or less equal in colors. Any thoughts on how to do this? or is it just as simple as taking some test photos (in RAW of course) and looking at the RAW histograms in Lightroom? This would be a good blog post for you: ” How to determine how much extra headroom you have for RAW exposure from the jpeg histogram” If only the camera manufacturers would give us RAW histogram information!
Thanks,
Ron Meyer
BTW, I love your ebook “Making the Image”!
Amen. I totally agree and have shared your post. I have just completely stopped participating in some of the more popular photography forums as technicians, pixel peepers, the “straight out of camera (aka Ansel Adams was a hack)” sect and the like who see things differently than I do tend to dominate them.
I do strive for perfect composition, exposure, crispness, blur, focus, whatever but the moment is there and I don’t have the best camera or lens for the moment I don’t just say it isn’t worth it. I used to spot meter but I also used to Sunny 16, now I primarily pick an in camera metering mode and adjust on the fly.
Overall I just want the moment and if the exposure or something else doesn’t warrant being a keeper I just move on.
Hi David:
A bit off the current topic, but I was wondering if you would give any thought to changing the font used in your website – I know as I’m getting older and have to wear glasses to read most everything nowadays, I find the font you use to be difficult to read at times.
Certainly not a rant, just an observation.
Love and admire your work, in fact, it’s the first bookmarked photo site I go to every day!
Thanks, take care.
I agree with what you say if your aim is to have a great image straight out of the camera (always a good thing).
The rule is there to provide the flexibility to make the choice later in post production.
Often, I found myself doing a ‘safe’ exposure for video shoots which get handled by someone else. When it’s purely personal work, I’ll go for the finished look in camera, blowing highlights or blocking shadows.
And it’s a good rule when it applies. But this article is about those times when you can’t capture the entire dynamic range. Sure, you must aim for the best possible digital negative, but that’s not always possible. But yes, more and more I’m also aiming for a great out of camera image. In some ways I’d describe it this way: I shoot RAW as if I’m using JPG.
Hi David, thanks a lot for the post.
I have a question, what happen when i print those blown highlights? Usually passing from zero to some ink on the paper it is not smooth or i do not know how to handle it.
You have no problem at all with that?
Thanks again.
Leo – Good point. What we photograph and what we print are often different. So once I’ve made the digital negative and I go into Lightroom to process it , I use the Tone Curve to pull my blacks and whites back into range. It doesn’t give any more detail but it does ensure better ink coverage when printing.
Hi David
Thanks for all your continued articles and videos – they truly are an inspiration and unique fountain of knowledge.
My preferred technique for high contrast scenes would be to spot meter and lock in the exposure (AE), then allowing me time to think of framing and capturing an exact moment. I am actually a fan of (P)rogram mode (gasp!), so would let my camera’s meter expose, allowing me to concentrate on the moment, and then in any subsequent seconds I would shift-dial the program to adjust the depth of field (or allow for motion blur).
This seems to work for me, although I never really see this method being written about. So I am keen to explore the more recognised pro method so see what advantages this brings.
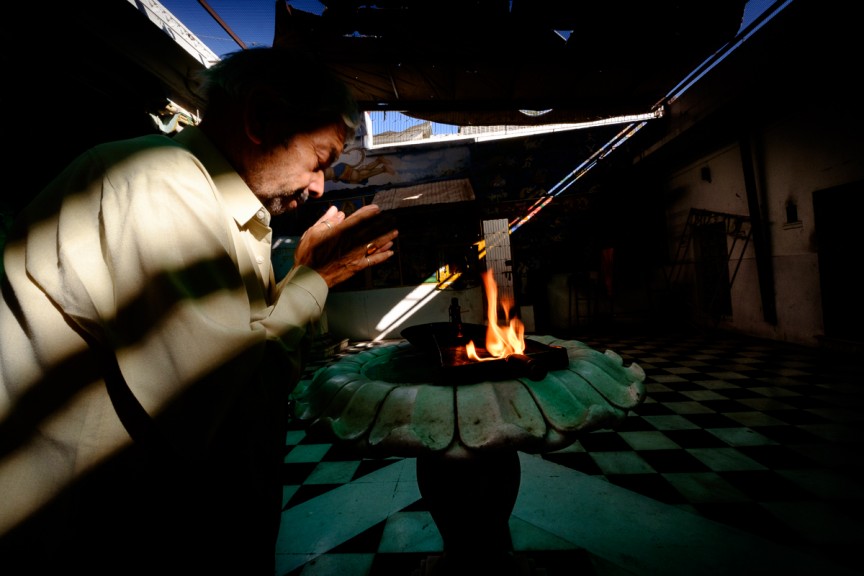
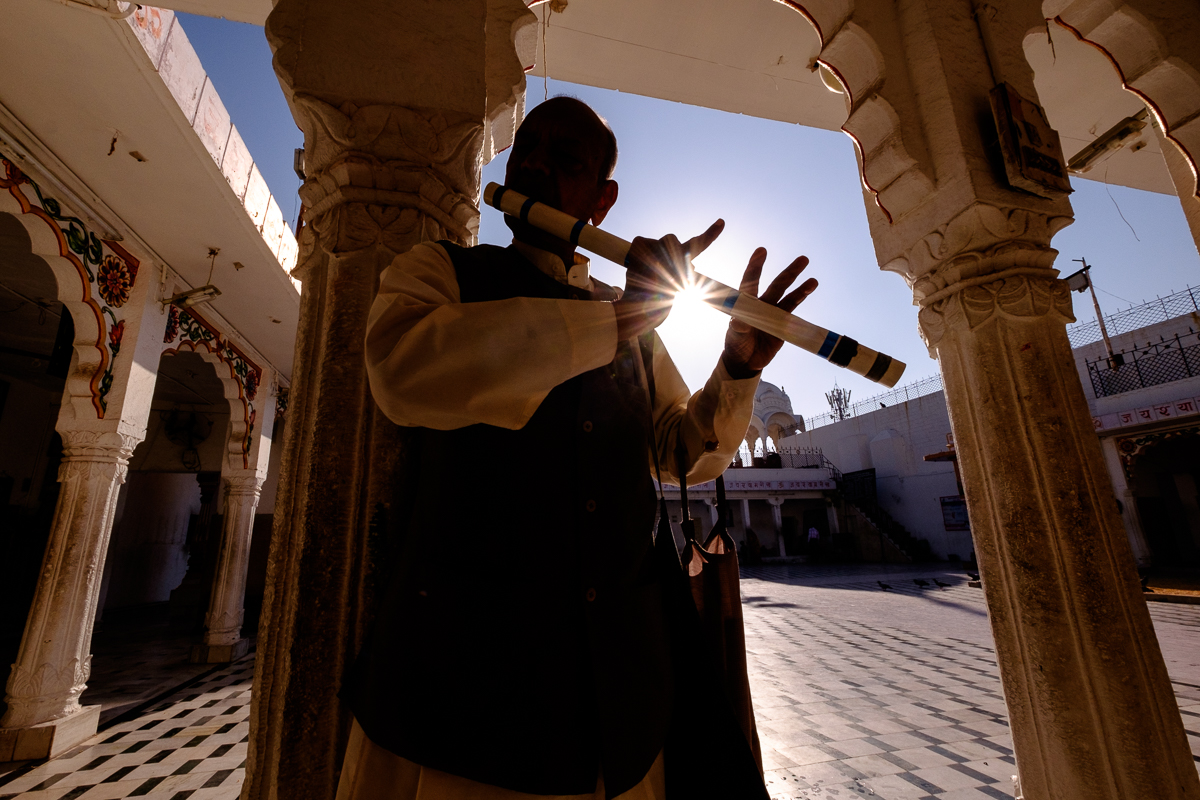
By the way – super shot of the Jodhpur temple pipe-player ! Imagining myself in that location, I would never have come up with that low down perspective shooting into the sun ! (Note to self: get more practice at shooting into the light, without silhouetting).
Keep up the great work. Looking forward to hearing about your upcoming Venice adventures.
Removing the guilt associated with rules and expectations allows the artist to fly just a little freer. I use this method more often than not but don’t express it because too many photographers frown. And I’m a coward who avoids confrontation. Know your rules, understand why they came into play, then break them to create your own images the way you want them to be seen. As always, thanks David for your insight.
Thanks for sharing that it’s okay to break “the rules of photography”. I see blog post after blog post telling us of the rules and what you should and shouldn’t do when it comes to your images. Very little on the creative process, which is the reason I subscribe to your blog newsletter.